
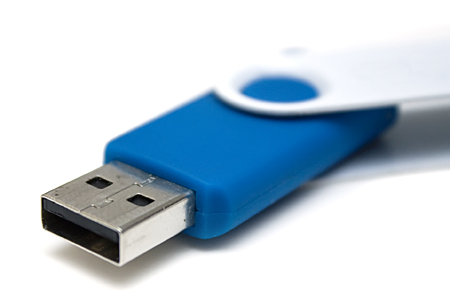
On Weekend Roundup #135, I mentioned that my wife’s Asus Eee 1005HAB was broken and that I was trying to fix it. One of the things I did to try to fix it was to flash the BIOS and since the netbook didn’t have a DVD/CD ROM drive, I had to do it via USB. To do that, I had to have a bootable USB drive or USB key. Creating a bootable USB drive is fast and easy but I know that some people don’t know how to do it or aren’t technologically knowledgeable, so I decided to write and share this short and simple tutorial.
How To Create a Bootable USB Drive


- Download/install the HP USB Disk Format Tool (Windows) from CNET.com or Softpedia.com.
- Download the Windows 98 system files from EXTREME Overclocking.
- Create a new folder and extract all the files (Windows 98 system files) into that new folder. (Make sure to keep the directory structure and remember where you placed that folder)
- Make sure that the USB drive is unlocked
- Plugin the USB drive into your computer’s USB port.
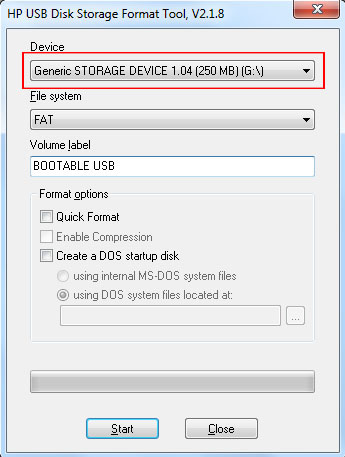
- Run the HP USB Disk Format Tool
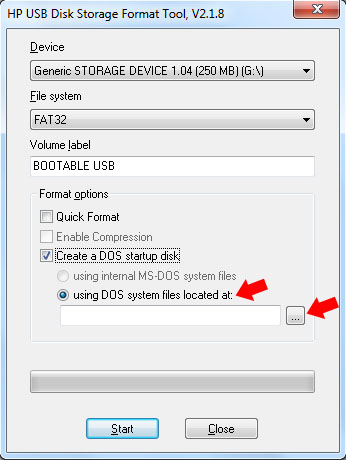
- Click on the drop-down list under Device and select the USB drive.
- For File system, select FAT32

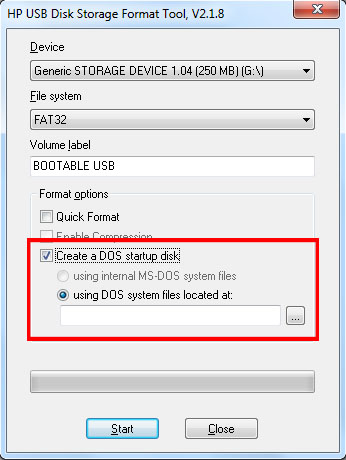
- In Format options, select/check Create a DOS startup disk
- Select “using DOS system files located at:” and click on the small box with the 3 dots.
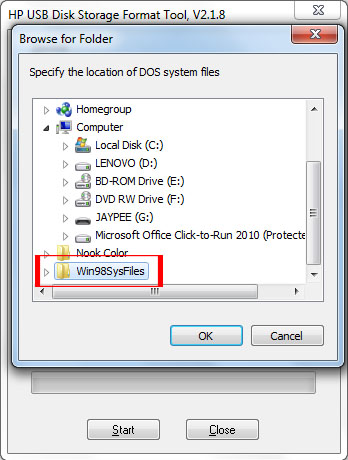
- Browse for the folder where you extracted the Windows 98 system files and click OK.
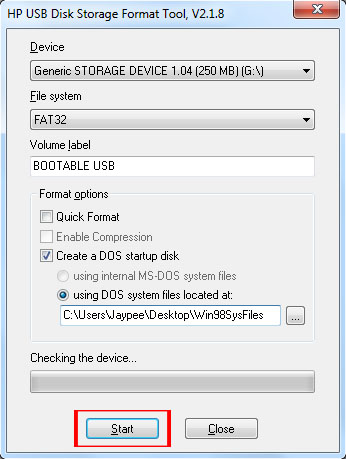
- Click on Start button.
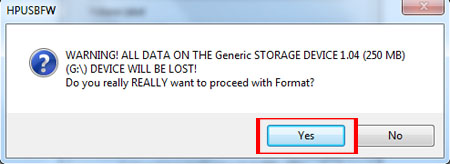
- It will display a warning message. Make sure you selected the right USB drive, if so then click Yes.
- The HP USB Disk Format Tool will format the USB key and copy the DOS system files into it.
- When the operation is done, click on Close.
- Voila! You just created a bootable USB drive.

To make sure that all the right files were copied into the USB key, browse into the USB key and check that the following files are there – COMMAND.COM, IO.SYS and MSDOS.SYS. If you don’t see the files, you’ll have to make sure that your system allows you to view protected operating system files.
To do that, go to Control Panel > Appearance and Personalization > Folder Options. Click on the View tab and look for “Hide protected operating system files (Recommended)” and uncheck it. You should now be able to see the DOS system files inside the USB key. If you want, you can go back and put a check back on “Hide protected operating system files (Recommended)“.
Btw, for CDROM support, copy all the Windows 98 system files and the CDROM folder (folder and files in Step #3) into the USB key. Doing so will not only enable CDROM support but also mouse support for any DOS programs that have this feature.
Hope this tutorial on how to create a bootable USB drive will be useful and helpful in case you need to create a bootable USB key to fix your computer or flash the computer BIOS.
i have tried this option, but when I boot with usb and try to browse other drives, i am not able to see them. the only drive i am in is the usb drive. i wanted to install an OS into my laptop which doesnt hav a cd drive.
I keep that in mind. My wife has an EEE PC netbook too and incase I need to reformat it or reinstall it this information will be very useful.
Yeah, you can bookmark it for future use. You’ll never know when it might come in handy.