
![]()
Whether you’ve used Kodi or not, you must have at least heard about it. After all, when you give mainstream media companies a run for their money, you are bound to end up in the news.
Online streamers who were shackled by the constraints of paid subscriptions can now easily watch unlimited TV shows, movies, sports, and a whole slew of other amazing content on Kodi.


As a result, people are ditching cable TV and streaming apps for Kodi, and I for one don’t blame them. After all, when you offer high-quality content for free, it’s hard to pass by.
Even though there are a lot of controversies surrounding Kodi, it is without a doubt one of the most essential home entertainment platforms around.
That said, Kodi isn’t all that easy to use. Unlike Netflix that offers a much more traditional plug-and-play streaming experience, Kodi requires a bit of elbow grease to work properly.
In this blog, I’m going to tell you 5 simple tips and tricks to make Kodi much easier to use.
So without further ado, let’s get right to it.
Oh! Before we begin, make sure you have Best VPN for Kodi 2019 installed on your device. You’ll thank me later ;)
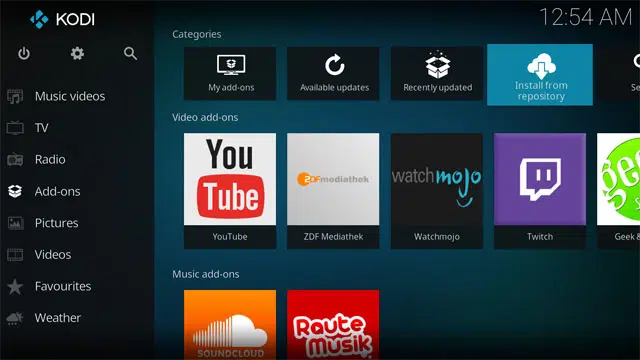
#1 Use Addons / Repositories Instead of Builds
If you’re just starting out with Kodi, don’t go for Builds straight away. Instead, test out the service by installing a couple of reliable addons using repositories.
Although I do admit Builds come pre-installed with a bunch of great add-ons, the only issue is that most of the add-ons within a Build tends to get blocked from time to time.
This is perfectly normal. After all, add-ons do tend to offer pirated content. If you pick and choose only that working add-ons using repositories, you’ll save yourself the hassle of deleting a whole lot of dead add-ons that come with certain Builds.
Manual installation also comes in handy when the repo server you’re downloading from runs slowly. Since the file you are downloading won’t timeout, you’ll actually be able to download it without retrying over and over again.
#2 Discard Old Memory Hogging Repos & Addons
Add-ons get blocked every now and then. An add-on that might work perfectly today, might not work tomorrow.
Like is said, the reason why add-ons get blocked from time to time has to do with copyrights. As soon as an add-on is caught infringing copyrights, it gets blocked.
That said, even if you keep on adding new add-ons to compensate for the blocked ones, you’ll likely face another dilemma.
Allow me to explain what I mean…
If you keep on adding new add-ons without getting rid of the ones that don’t work, you’re only going to makes things worse. Everything is going to get slower and slower with time. Although a well-specced out device might not give you any trouble, you’ll definitely notice lags with older or mobile devices.
This is where deleting old repositories and add-ons pay off. Getting rid of old repositories and add-ons not only cleans things up but also greatly optimizes Kodi’s performance.
If your current add-ons no longer work, you can check out Top Kodi addons for some new ones.
#3 Only Go For Legal Add-ons
Although third-party add-ons are undoubtedly way better than the official add-ons, they are without a doubt illegal to use.
Aside from being illegal, some unofficial add-ons are also quite unstable. While some of them would give you a hard time downloading, others would act up after installation.
Although a VPN can take care of legal complications, it can’t fix crappy add-ons.
That said, if you’re a casual streamer, even the official Kodi add-ons should be more than enough for you. After all, you can catch BBC iPlayer, Al Jazeera, ESPN, NBC, and a whole plethora of content without even having to rely on unofficial add-ons.
#4 Improve Streaming Speeds
Although Kodi is amazing in every way possible, it does have one apparent issue. Sometimes you’ll face infuriatingly slow streaming speeds.
Contrary to popular belief, slow streaming speeds have nothing to do with your internet connection speeds. If too many people join a certain stream, you’re going to experience either endless buffering or snail-paced streaming.
What’s worse? Fixing this annoying issue is not that easy. In order to fix this issue, you’ll need to mess around with advancedsettings.xml.
Since Kodi is compatible with all devices, the advancedsettings.xml file is not universally stored in one location. In order to modify the internal settings, you’ll need to look up the advancedsettings.xml file for your specific device. A simple Google search should do the trick.
Once you locate the file, you’ll have to modify two lines of codes. I’ll list both of them down below.
<memorysize></memorysize>
<readfactor></readfactor>
The above-mentioned line of codes is pretty self-explanatory. The first one refers to the allocated memory or Ram and the other one refers to the allocated bandwidth.
To maximize the performance, put a simple “0” between the
Wrapping Up!
So there you have it, folks, these were my top 4 tips to improve your Kodi experience. Hopefully, now you can enjoy all your favorite content without any hassle.
Since you made it this far, I’ll add a little bonus for you guys. If you want to get amazing all in one Kodi add-ons, make sure you checkout Top Kodi builds.
This is a guest contribution by Abdul Rehman, a simple Tech savvy bloke with a neck for writing. Monday to Friday, he enjoys delving down into the inner workings of privacy and security of top-tier VPN providers. Nevertheless, on the weekend he is a bit modest and simply loves spending time with his dog. You can follow him on Twitter.