
Each time Ubuntu installs a new Linux kernel (upgrade), it leaves the old one installed. It means if you update/upgrade regularly, the Grub boot menu will be filled with all the Linux kernels you installed on your system, even those you no longer need. Btw, this is done purposely to make sure that you can boot to a previous kernel in case you have problems with the new installed kernel. However, if the new kernel works for you, you can uninstall and remove the older kernels to clean up the Grub boot menu. Today, I’m gonna show you how to remove old Ubuntu kernels.
In older versions of Ubuntu you can just open a terminal or hit Alt+F2 and type in this command: gksu gedit /boot/grub/menu.lst. The thing is, in newer versions of Ubuntu (9.4+) the menu.lst file was replaced by /boot/grub/grub.cfg which is a read-only file and is not supposed to be edited, making that solution obsolete.
The best and safest way to clean up the Grub boot menu is to use the Synaptic Package Manager. Here’s how to do it:


1. First thing to do is find out the current version of the Linux kernel you’re using. Open a terminal and type in the following command uname -r
2. It will display the Linux kernel version you are using which should look something like this: 2.6.31-20-generic. (Take note of that number, you’ll need it for later)
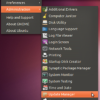
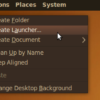
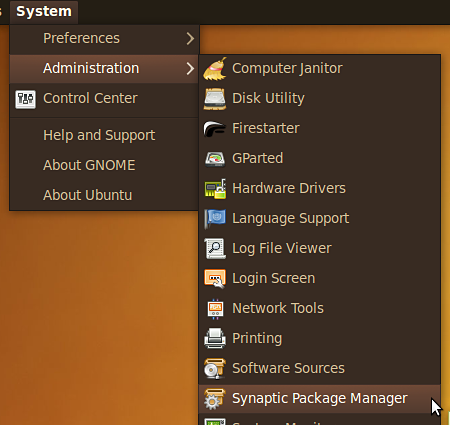
3. Open the Synaptic Package Manager. Click on System > Administation > Synaptic Package Manager
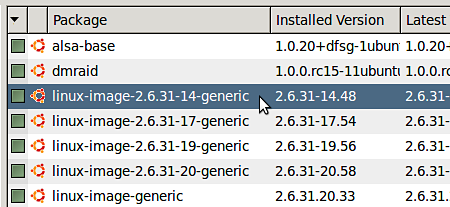
4. On the “Quick search” box, type in linux-image.
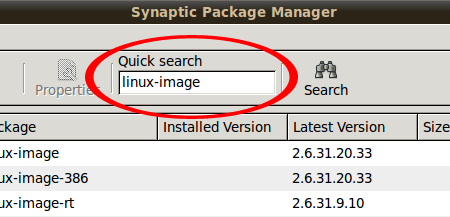
5. It will list all available and installed Linux kernels. Look for those that have a green box on it (A green box indicates an installed package). To make it easier to find the packages, click on the column above the boxes to sort them and group them together.
6. Remember the Linux kernel version you got from Step #2? Find that package and make sure you don’t remove/uninstall it. Also, don’t remove the “linux-image-generic” package.
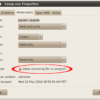
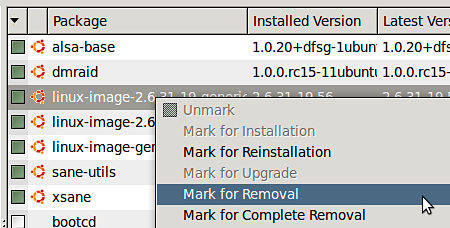
7. Now, find the other older versions of Linux kernels that you want to remove (Packages that have “linux-image-2.6.*”) and uninstall them. Do that by clicking on the box and select “Mark for Removal“.
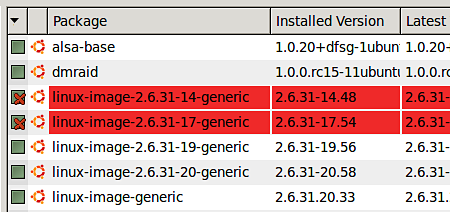
Marked packages will be highlighted in red and the boxes will have an X on it.
IMPORTANT: Make sure that you don’t remove the Linux kernel package that you’re currently using (Step #2). Doing so can break your Ubuntu installation.
8. Click on the “Apply” button to complete the process.

That’s it. Reboot your computer and check the Grub boot menu. It should be shorter and clean from old Linux kernels that you no longer need.
Hope you like this tutorial on how to remove old Ubuntu kernels. If you find it helpful and useful, please don’t forget to bookmark and share it. Thank you!


Thanks a lot. I found this after a few minutes of searching the web, The other solutions I found was much more complicated but this one was 2 simple steps to follow, find current kernel and how to remove the old ones, and it worked like a charm.
See how it is done here whit aline of code and no software
http://tuxtweaks.com/2010/10/remove-old-kernels-in-ubuntu-with-one-command/
and the line is:
dpkg -l linux-* | awk ‘/^ii/{ print $2}’ | grep -v -e `uname -r | cut -f1,2 -d”-“` | grep -e [0-9] | xargs sudo apt-get -y purge
Thanks for the tutorial! I tried to remove the unused kernels on my Eee PC 901 running Eeebuntu, but I get the following error message when I mark the kernels I want to remove in Synaptic and click “Apply”:
Finally a somewhat elegant way to do it. Why doesn’t Ubuntu have a normal way of cleaning these things up?
Thanks for the simple instructions Jaypee. I searched for a while and found more complicated methods to clean up the old kernels. You made it easy!
Great tip and advice. I did what Jhay said and kept the main kernel and the one before it, just in case. Thanks, dave
@Walt – Yeah, that works too but its too complicated for some users. This article is for users who are new to Ubuntu/Linux and shares the “easy” way to do it. Thanks for sharing though! :D
I’m running 2.6.32-23-generic so I did:
COLUMNS=500 dpkg -l | egrep '2\.6\.' | egrep -v '2\.6\.2[5-8]-'
and found a bunch of obsolete “linux-headers-*” and “linux-restriced-modules*” packages to clean up as well.
@Jhay – That’s what I do too. Btw, thanks for mentioning that, I think I should edit the post and add that so users can have a backup, just in case. Thanks! :)
Jaypee, don’t we need to do a sudo update-grub as well? I thought that only by doing the grub update would the menu get fixed. Also, my grub2 boot selection menu has many, many more kernel entries than just the installed kernels visible from Synaptic. I guess I’ll have to go back and review what’s going on in my grub config files so that I’ll have a simplified boot menu. Sigh.
I keep the two newest version of the Ubuntu kernel when I was still using the OS, so that in case the upgrade doesn’t work, it can always revert to the previous one.
Recovering hard disk space but loosing security and system stability has always been a bad thing. :P